Welcome to a fun journey of science! Science is all about exploring and understanding the world. Our blog is filled with simple and exciting science experiments for kids. We’ve chosen experiments that you can easily do at home with things you probably already have. Whether it’s a rainy day or you’re looking for something educational for the weekend, these experiments are perfect. Get ready to explore science together and see your kids become little scientists, learning and having fun at the same time!
1. Cocoa Powder – That Can’t Get Wet in Milk
This is a fascinating and simple demonstration of surface tension and hydrophobic (water-repelling) properties of certain materials. Here’s how you can perform this experiment:
Materials Needed:
- A bowl
- Milk (or water)
- Cocoa powder
- A spoon (optional)
Steps:
a. Fill the Bowl: Begin by filling a bowl with milk. You can use water as well, but milk’s higher fat content makes the effect more pronounced and visible.
b. Add Cocoa Powder in a spoon: Take cocoa powder in the spoon and dip it through the surface of the milk. Try to cover the surface evenly without disturbing it too much.
c. Observe the Surface: At this point, you’ll see that the cocoa powder floats on top of the milk and doesn’t mix. This is because cocoa powder is hydrophobic, meaning it doesn’t like milk. The cocoa particles stick together and stay floating because of surface tension, which makes the milk’s surface strong like a thin skin.
d. Breaking the Surface Tension: For an additional test, you can gently touch the center of the cocoa powder layer with a spoon or your finger. This action breaks the surface tension underneath the cocoa powder. You’ll observe that the cocoa powder either clumps together more tightly or starts to mix into the milk, depending on how much you disturb the surface.
2. Balance Water Bottle with Matchstick:
This science experiment is a fun and educational demonstration of balance, center of gravity, and leverage. This experiment shows how you can balance a water bottle at an unexpected angle using just a matchstick . Here’s how you can perform this experiment:
Materials Needed:
- A full water bottle with a rope near the top
- Matchstick
- A sturdy surface or table
- Hammer
Steps:
a. Ensure the water bottle is full. The water adds weight and lowers the center of gravity, making the experiment more successful.
b. Place the matchstick on the edge of the table and secure one end of the matchstick with the weight of the hammer. Add rope to the bottle and hang it on a matchstick.
c. Now two more matches are required. Put one match horizontally across the rope and another match we will need to put at pivot point so it would connect both matchsticks.
d. Carefully take away the hammer and look at a pure magic look at this. You can even push this a little bit so now the bottle is hanging on just one tiny match with the help of two little matches. This happens because the center of gravity is directly above the support point.
3. Make a hole in the bubble:
Making a hole in a bubble using a loop of thread is a captivating experiment that demonstrates surface tension and the elasticity of soap films. This experiment extends the concept of surface tension in a visually interesting way, showing that a bubble can maintain its integrity even when an object passes through its center, under the right conditions. Here’s how you can do it:
Materials Needed:
- Dish soap
- Glycerin (optional, but it helps make the bubbles stronger)
- Water
- A shallow dish or bowl
- Thread (cotton works well)
- A straw or bubble wand
- Scissors
Steps:
a. Mix dish soap with water in the bowl to create your bubble solution. Adding a little glycerin can make the bubbles more durable and easier to work with.
b. Cut a piece of thread about 12 inches long and tie the ends together to make a loop.
c. Soak the loop of thread in the bubble solution so it’s completely wet. This step is crucial for the experiment’s success.
d. Using the straw or bubble wand, blow a large bubble on the surface of the solution in the dish. You want the bubble to be big enough to accommodate the thread loop easily.
e. Carefully lift the wet loop from the solution and gently place it on top of the bubble. The goal is to have the loop rest on the bubble without breaking it.
f. Once the loop is resting on the bubble, quickly but carefully pull the loop upward. As you lift, the center of the loop should cut through the bubble, creating a hole without popping the bubble. If done correctly, you will have a bubble with a hole in the middle, and the loop can be completely removed.
4. How To Make A Tornado In A Bottle:
Making a tornado in a bottle is a fun and easy science experiment that demonstrates a vortex’s properties. This activity is perfect for kids and adults alike, offering a visual insight into how tornadoes form and behave. Here’s a simple guide to creating your own tornado in a bottle:
Materials Needed:
- Two matching empty drinks bottles with ‘flip lids’
- Blue Tac
- Tape
Steps:
a. Start by taking a flip lid and remove the part that flips over. You only need one lid for this experiment!
b. Fill a bottle with water until it’s about three-quarters full. Then, put the lid on and cover the top of the lid with Blue Tac.
c. Place another empty bottle on top of the first one and use the Blue Tac to seal them together. You might want to use tape to stop any leaks.
d. Now, let’s create a tornado! Make sure the bottle filled with water is on top. Hold the bottles upright and start swirling the water around fast, like you’re mixing a witch’s potion. After swirling for a few seconds, stop and hold the bottles still to watch your tornado form!
5. Candle and rising water science experiment:
In this fun experiment In this science experiment, we’re going to find out two things:
a. What happens to a candle flame when we cover the candle with a glass?
b. What does the air pressure inside the glass do when the candle flame goes out?
Materials Needed:
- Glass
- Candle
- Water
- A ceramic plate
Steps:
a. Put the candle on the plate. Pour water into the pie plate so that it just covers the bottom of the candle.
b. Light the candle and let it burn for a bit. Then cover it with a clear glass so you can still see the light.
c. Keep an eye on the water. Right after the candle goes out, water will start to move into the jar!
d. The water will rise up higher than the level in the rest of the plate!
6. Oil and Ice Density Experiment:
This experiment is fast and easy to do, but it adds something extra to the basic oil and water experiment for young scientists. Take this simple idea, and I’m excited to see the different versions you create!
Materials Needed:
- Oil (vegetable works great and is cheap)
- Ice Cube
- Water
- Glass
Steps:
a. Fill the glass with water, but only up to one-third full.
b. Add roughly the same amount of oil as you did water.
c. Drop the ice cube into the glass and watch what happens!
d. Ice can float on both oil and water. But, when the ice melts, it turns back into liquid water. Liquid water can’t float on oil, so it sinks to the bottom.
e. The ice floats because it’s lighter than both the water and the oil. But when the ice melts, it becomes heavier than the oil, so it goes through the oil and mixes with the water at the bottom.
7. Balloon and a Jar – Air Pressure Science Experiment:
For the Air Pressure Science Experiment with a Balloon and a Jar, you’ll do something really interesting to learn about how air pressure works.
Materials Needed:
- Oil (vegetable works great and is cheap)
- Ice Cube
- Water
- Glass
Steps:
a. Put water in the balloon until it’s slightly too big to go through the jar’s top.
b. Light a small piece of paper on fire and drop it into the jar.
c. Quickly put the balloon on the jar’s opening.
d. Watch closely to see what happens.

Moonpreneur
Conclusion
These interesting science experiments demonstrate fundamental scientific principles in a fun and engaging manner, encouraging young minds to question, explore, and understand the world around them. By trying out these experiments, children not only learn about scientific concepts but also develop critical thinking and problem-solving skills. So, grab a few household items and embark on a journey of discovery with your children. Let’s inspire the next generation of scientists by making science an adventure they can’t wait to explore.
Moonpreneur is on a mission to educate and ignite the flames of entrepreneurship through our holistically created online STEM programs, which will help kids master the futuristic sciences such as Robotics, Game Development, App Development, Advanced Math, and much more!!
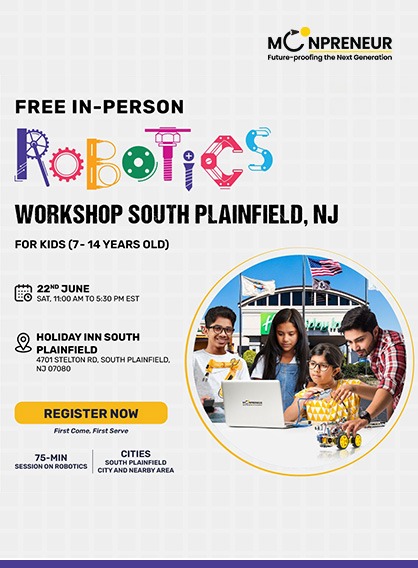
Register for a free 60-minute robotics workshop today!